Need help?
Unsure whether you need a bath or a plunge, portable or fixed, chiller or iced? Check out Sasha’s cold plunge vs ice bath article to answer all and get clarity on your cold immersion needs.
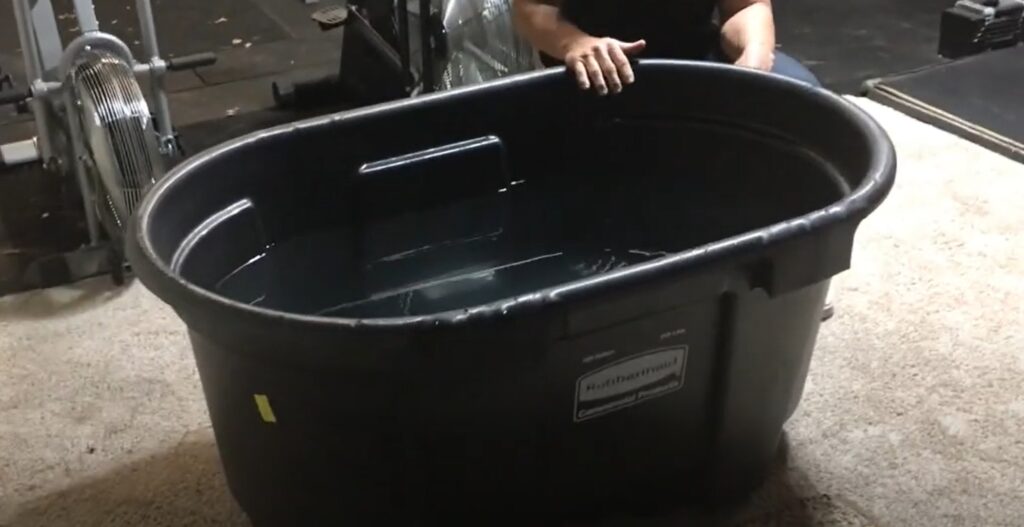
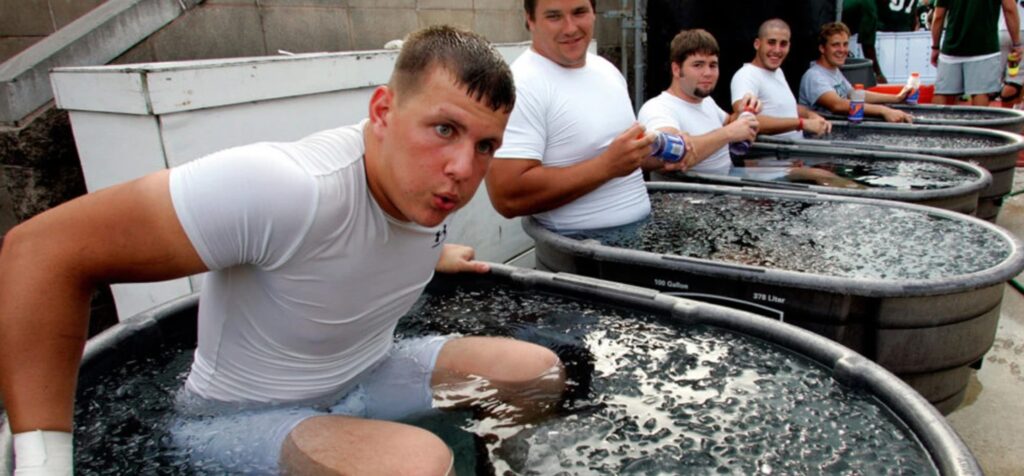
Listen up, warriors – let’s cut through the BS about fancy ice bath setups that cost more than your car payment. After testing literally every DIY cold plunge configuration imaginable (including one sketchy experiment with a chest freezer that we won’t talk about), I’ve found the holy grail: the Rubbermaid 150-gallon stock tank ice bath. Here’s the raw truth about turning this livestock watering tank into your personal laboratory of cold exposure mastery.
Contents
- 1 TL;DR – Quick Picks for Your Ice Bath Setup:
- 2 Why Trust This Review?
- 3 The Cold Hard Facts About the Tank
- 4 The Real-World Experience
- 5 Essential Add-Ons for the Ultimate Setup
- 6 The No-BS Setup Guide
- 7 Temperature Control: The Advanced Game
- 8 Real Talk: Maintenance That Matters
- 9 Advanced Usage Techniques
- 10 Troubleshooting Common Issues
- 11 Cost Comparison: Reality Check
- 12 The Bottom Line
- 13 Frequently Asked Questions
TL;DR – Quick Picks for Your Ice Bath Setup:
🏆 Best Overall: Rubbermaid 150-Gallon Stock Tank – Perfect balance of size and durability
💪 Best Cover: Plunge Crafter Insulated Cover – Premium insulation, worth every penny
🌟 Budget Cover: COSFUN Tank Cover – Solid protection without breaking the bank
Why Trust This Review?
I’ve personally been using this exact setup for over two years, testing it through brutal Colorado winters and scorching summers. I’ve put my body through thousands of cold immersions and helped dozens of athletes and beginners set up their own tanks. This isn’t some theoretical review – this is battle-tested experience.
The Cold Hard Facts About the Tank
Dimensions and Specs
- – Size: 59″x39″x24.5″
- – Capacity: 150 gallons
- – Material: Structural foam construction
- – Weight: 53 pounds (empty)
Our Testing Criteria
| Feature | Rating (1-10) | Why It Matters |
|---|---|---|
| Durability | 9.5 | Survives extreme weather and daily use |
| Size/Comfort | 8.5 | Fits most bodies with room to move |
| Temperature Control | 7.5 | Holds temp well with proper cover |
| Value | 9.5 | Fraction of commercial plunge cost |
The Real-World Experience
Let me be brutally honest – this tank wasn’t designed for ice baths. It was made for watering livestock. But here’s the beautiful thing: its overbuilt construction makes it perfect for our purposes. I’ve had 300-pound powerlifters climb in and out without a hint of stress on the structure.
What Actually Works
- – Bulletproof construction
- – Perfect depth for full immersion
- – Wide enough for comfortable positioning
- – Drain plug actually works (unlike some fancy setups)
- – Easy to clean and maintain
What Could Be Better
- – Non-standard drain fitting (but easily modified)
- – Basic aesthetics (but who cares?)
- – No built-in temperature control
Essential Add-Ons for the Ultimate Setup
Here’s where you can transform this simple tank into a legitimate cold plunge system:
1. Insulated Cover
This isn’t just some fancy pool cover – it’s the difference between changing your water every day and keeping it cold for a week. The Plunge Crafter brand cover is worth every penny.
2. Basic Weather Cover
If you’re on a budget, the COSFUN cover keeps leaves and debris out while offering basic protection. Not as good as the insulated version, but limits the water changes.
3. Temperature Control
Skip the expensive chillers. Get creative with a good thermometer and frozen water bottles or ice blocks. I’ve tested both methods extensively – they work just as well at a fraction of the cost.
The No-BS Setup Guide
Look, I’ve helped dozens of people set this up, and I’m going to save you from making the rookie mistakes that’ll have you cursing at 3 AM while dealing with a flooded yard. Here’s the step-by-step that actually works:
Location Setup
- – Level ground is non-negotiable (use pavers if needed)
- – Drainage matters more than you think
- – Consider privacy (unless you enjoy giving neighbors a show)
- – Access to water source (trust me, you don’t want to run 200 feet of hose)
The Ultimate Plumbing Hack
Here’s something the manual won’t tell you: That 1.5″ drain plug can be a pain, but here’s my tried-and-true modification:
- Get a 1.5″ to 3/4″ reducer from any hardware store ($5)
- Add a ball valve ($12)
- Attach standard garden hose fitting ($4)
Boom – now you can drain anywhere without flooding your space. You’re welcome.
Temperature Control: The Advanced Game
INSIDER TIP: If you’re plunging a lot then invest in a chiller system, it’ll be cheaper in the long run. If it’s just occasional then here’s my method that costs under $50 and keeps water at 39°F (4°C) even in summer:
The Rotation Method
- – Fill 4-6 two-liter bottles with water
- – Freeze solid
- – Rotate 2 bottles every 12 hours
- – Add one bag of ice before sessions
Real Talk: Maintenance That Matters
I’ve seen too many people trash their setups by skipping basic maintenance. Here’s what actually needs to happen:
Daily
- – Check water clarity
- – Remove any debris
- – Confirm temperature
- – Secure cover properly
Weekly
- – Test water quality
- – Clean sides with non-toxic cleaner
- – Check drain plug tightness
- – Inspect cover for damage
Monthly
- – Complete water change
- – Deep clean all surfaces
- – System integrity check
- – Sanitize thoroughly
Advanced Usage Techniques
Once you’ve got the basics down, here’s how to take your cold plunge practice to the next level:
Progressive Adaptation Protocol
| Week | Duration | Temperature | Focus |
|---|---|---|---|
| 1 | 1-2 minutes | 55°F (13°C) | Breathing control |
| 2 | 2-3 minutes | 50°F (10°C) | Mental control |
| 3 | 3-5 minutes | 45°F (7°C) | Full immersion |
| 4+ | 5+ minutes | 40°F (4°C) | Peak performance |
Troubleshooting Common Issues
After helping countless people with their setups, here are the real solutions to problems you’ll actually face:
Water Getting Cloudy?
Skip the fancy products. Add 1/4 cup of food-grade hydrogen peroxide per 100 gallons. Clear as crystal within hours.
Temperature Fluctuating?
It’s probably your cover seal. Check the edges for gaps and adjust the straps. You’d be amazed how much cold air sneaks in through tiny spaces.
Drain Leaking?
Don’t overtighten – that makes it worse. Remove, clean the threads, apply plumber’s tape, and hand-tighten only. Problem solved.
Cost Comparison: Reality Check
| Setup Type | Initial Cost | Monthly Cost | Annual Cost |
|---|---|---|---|
| Commercial Cold Plunge | $4,000-$10,000 | $50-100 | $600-1,200 |
| Our DIY Setup | $500-700 | $10-20 | $120-240 |
The Bottom Line
Look, you could drop five grand on a fancy setup with Bluetooth temperature control and mood lighting. But here’s the truth: cold is cold. This Rubbermaid tank setup will give you the same physiological benefits at a fraction of the cost. It’s not pretty, but it works. And isn’t that what really matters?
Frequently Asked Questions
How big of stock tank for ice bath?
For ice baths, a 150-gallon stock tank (59″x39″x24.5″) is ideal for most adults. This size accommodates users up to 6’6″ tall and allows full body immersion with proper water displacement. While 100-gallon tanks work for smaller individuals, the 150-gallon size offers better temperature stability and room for movement during cold water therapy sessions.
Is a 100 gallon tank big enough for a cold plunge?
A 100-gallon tank (53″x31″x25″) is sufficient for individuals under 5’10” but may be limiting for larger users. While functional, users over 180 pounds may find water displacement reduces effective depth. The 100-gallon size requires more frequent temperature management due to lower water volume, though it’s adequate for basic cold plunge therapy.
How do I keep my stock tank ice bath clean?
To maintain a clean stock tank ice bath: – Add 1/4 cup food-grade hydrogen peroxide per 100 gallons weekly – Change water every 2-4 weeks depending on usage – Wipe sides with non-toxic cleaner during water changes – Use a floating pool filter for debris – Always shower before use – Keep covered when not in use Regular maintenance prevents bacterial growth and ensures water clarity.
What size tank do I need for a cold plunge?
Choose your cold plunge tank size based on these guidelines: – 150-gallon (59″x39″x24.5″): Ideal for users up to 6’6″ tall – 100-gallon (53″x31″x25″): Suitable for users under 5’10” – 300-gallon: Best for multiple users or commercial settings For most individuals, a 150-gallon tank offers the optimal balance of size, water volume, and temperature stability.
Quick Size Reference Chart
| User Height | Recommended Tank Size | Water Volume |
|---|---|---|
| Under 5’8″ | 100 Gallon | 80-90 gallons filled |
| 5’8″ – 6’6″ | 150 Gallon | 120-130 gallons filled |
| Multiple Users | 300 Gallon | 250-270 gallons filled |
This website may contain affiliate links. As an affiliate, we may earn a commission from qualifying purchases at no additional cost to you.
