Need help?
Unsure whether you need a bath or a plunge, portable or fixed, chiller or iced? Check out Sasha’s cold plunge vs ice bath article to answer all and get clarity on your cold immersion needs.
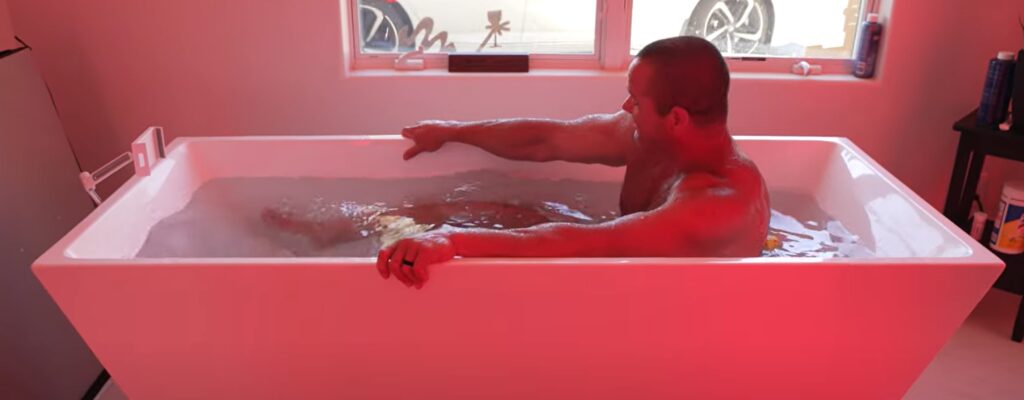
There’s something profoundly awakening about that first breath when you step into cold water. Combined with the gentle warmth of red light therapy, these practices have transformed not just my own wellness journey, but those of countless others I’ve guided along this path.
In this comprehensive guide, I’ll share how to mindfully combine cold plunge and red light therapy for a powerful healing modality, drawing from both ancient wisdom and modern science to help you create lasting change in your daily practice.
Contents
- 1 TL;DR – Quick Essentials:
- 2 Understanding the Power of Cold Plunge and Red Light Therapy
- 3 7 Reasons to Try:
- 4 Getting Started: A Mindful Approach
- 5 The Daily Practice
- 6 Adapting Your Practice Through the Seasons
- 7 Frequently Asked Questions
- 7.1 Should you cold plunge after red light therapy?
- 7.2 Should you ice before or after red light therapy?
- 7.3 What not to do after a cold plunge?
- 7.4 What should I avoid after red light therapy?
- 7.5 Can I do both therapies every day?
- 7.6 Which therapy should I do first?
- 7.7 How long until I see results?
- 7.8 Is this safe during pregnancy?
- 8 Tracking Your Journey
- 9 Embracing the Journey
TL;DR – Quick Essentials:
🌊 Cold Plunge Essentials:
- Start at 60°F/15°C for beginners
- 2-3 minute sessions
- Practice box breathing technique
- Best with morning light exposure
💡 Red Light Basics:
- 10-20 minute sessions
- 6-12 inches from light source
- Consistent daily practice
- Ideal post-plunge therapy
✨ Recommended Gear:
Cold Plunge:
- Cold Plunge tub (investment piece)
- Ice Bath (mid-range option)
- Portable Ice Bath (budget-friendly)
Red Light:
- Bestqool Red Light (full-body coverage)
- Lifepro (travel-friendly)
- Tuohun Panel (excellent starter device)
Understanding the Power of Cold Plunge and Red Light Therapy
The first time I stepped into cold water, it wasn’t in a fancy tub or carefully temperature-controlled environment – it was the Pacific Ocean in early spring. That experience taught me something crucial about our body’s innate wisdom and its ability to adapt to environmental stressors.
What I’ve learned since then, especially after incorporating red light therapy, is that these practices aren’t just about physical endurance – they’re about creating a dialogue with your body’s natural healing abilities.
The Science, Simplified
When you immerse yourself in cold water, your body initiates what I like to call the “natural reset button.” Your blood vessels constrict, sending blood to your core organs, and then dilate upon warming, creating a powerful flush of fresh, oxygen-rich blood throughout your system.
I’ve found that following this with red light therapy creates an almost magical synergy. The specific wavelengths (I typically use 660nm and 850nm) penetrate deep into your tissues, energizing your cells just when they’re most receptive after the cold exposure.
7 Reasons to Try:
Enhanced Recovery and Muscle Repair
Cold plunge reduces inflammation and muscle soreness through blood vessel constriction, while red light therapy stimulates cellular repair by boosting mitochondrial function. Together, they create a powerful recovery system that helps athletes and fitness enthusiasts bounce back faster from intense workouts.
Improved Circulation
Cold plunges create a pump-like effect through vasoconstriction followed by vasodilation, while red light therapy promotes nitric oxide production to relax blood vessels. This combination enhances overall blood flow, delivering nutrients more efficiently and removing metabolic waste more effectively.
Boosted Immune Function
Cold exposure increases white blood cell production, strengthening immune response, while red light therapy helps modulate immune function and regulate inflammation. The combination creates a robust defense system against illness and infection.
Pain Relief
Cold plunge provides immediate pain relief through numbing and reduced swelling, while red light therapy addresses pain at the cellular level by improving function and reducing inflammation. Together, they offer a comprehensive approach to pain management.
Mental Clarity and Mood Enhancement
Cold plunges trigger endorphin release for immediate mood elevation and alertness, while red light therapy influences serotonin levels for longer-term mood regulation. The combination supports both immediate and sustained mental well-being.
Skin Health Improvement
Further Reading: Ice Bath Benefits for Skin
Cold plunge tightens pores and improves blood flow to the skin, while red light therapy stimulates collagen production and skin rejuvenation. Combined, they offer comprehensive skin care benefits for a more youthful appearance.
Synergistic Health Benefits
The combination of both therapies creates a holistic approach to health, enhancing stress resilience through cold adaptation while promoting cellular healing through red light exposure. This synergy supports both physical and mental well-being.
Getting Started: A Mindful Approach
The Breathing Foundation
Start with this simple technique I teach all my beginners:
- Inhale for 4 counts
- Hold for 4 counts
- Exhale for 4 counts
- Hold for 4 counts
This box breathing pattern helps manage the initial cold shock response and centers your mind before each session.
Creating Your Sacred Space
I recommend setting up your practice area thoughtfully. My personal setup includes:
- A dedicated cold plunge area (I use the Ultimate Plunge tub for its reliability and temperature control)
- Nearby red light therapy station (the Joovv Elite mounted on the wall)
- Essential oils for aromatherapy (eucalyptus and pine work beautifully)
- Non-slip mat for safety
- Timer within easy reach
- Meditation cushion for pre-plunge centering
The Daily Practice
Morning Protocol (My preferred approach):
- Light meditation (5 minutes)
- Box breathing preparation
- Cold plunge (2-3 minutes at 55°F/13°C)
- Gentle movement
- Red light therapy (15 minutes)
Evening Alternative:
- Gentle yoga or stretching
- Shorter cold exposure (1-2 minutes)
- Red light therapy (20 minutes)
- Meditation
Weekly Progress Path
Week 1: Foundation
- Water temperature: 60°F/15°C
- Duration: 30-60 seconds
- Red light: 10 minutes
- Frequency: 3x weekly
Week 2-3: Building Resilience
- Water temperature: 55°F/13°C
- Duration: 1-2 minutes
- Red light: 15 minutes
- Frequency: 4-5x weekly
Week 4+: Advanced Practice
- Water temperature: 50°F/10°C
- Duration: 2-3 minutes
- Red light: 20 minutes
- Frequency: Daily practice
Mindful Integration Tips
🫁 Breathing Focus
I’ve found the most success using the Wim Hof method before plunging. My go-to pattern is:
- 30 power breaths
- Hold on empty for 1 minute
- Recovery breath
- Repeat 3 rounds
🧘♀️ Mental Preparation
Before each session, I use this simple mantra: “I embrace the cold as my teacher.” This helps shift your mindset from resistance to acceptance.
🌅 Timing Optimization
I’ve discovered that morning sessions (between 6-8 AM) yield the best results, especially when combined with sunrise exposure.
Essential Equipment: My Personal Recommendations
Cold Plunge Setup
After trying various options, I settled on the Ultimate Plunge tub for its reliability and precise temperature control. However, I started with a converted chest freezer, which remains an excellent budget option.
Investment Options:
- Premium: Ultimate Plunge tub ($4000+) – Perfect temperature control
- Mid-range: ColdLife Lite ($900+) – Great portable option
- Budget: Spartan Tub ($400+) – For limited space
Red Light Therapy Devices
I began with a small Tuohun panel and gradually upgraded to the Bestqool as my practice deepened. Both served their purpose perfectly at different stages.
Recommended Devices:
- Bestqool Red Light – Comprehensive coverage
- Lifepro – Perfect for targeted areas
- Tuohun Panel – Excellent entry point
Adapting Your Practice Through the Seasons
🌸 Spring
- Gradually decrease water temperature
- Incorporate outdoor practices
- Red light: 15-20 minutes
☀️ Summer
- Earlier morning sessions
- Shorter cold exposures
- Red light: 10-15 minutes
🍂 Fall
- Gradually increase exposure time
- Focus on breathing work
- Red light: 20-25 minutes
❄️ Winter
- Maximum cold exposure benefits
- Enhanced recovery focus
- Red light: 25-30 minutes
🌡️ Temperature Resistance
One of the most common hurdles I see with my students is the initial fear of cold temperatures.
Gentle Solutions:
- Start with cool showers (65°F/18°C)
- Practice face-only immersion
- Use my “3-2-1” gradual immersion technique
⏰ Time Management
Finding time for both practices can feel overwhelming at first.
Integration Tips:
- Stack with existing morning routine
- Start with shorter sessions (even 1 minute counts!)
- Use red light during meditation or reading
💡 Device Positioning
Proper setup of red light therapy can be tricky, especially for beginners.
Setup Guide:
- Mark optimal distances on your floor
- Use a timer with positioning reminders
- Create dedicated therapy space
Frequently Asked Questions
Should you cold plunge after red light therapy?
No, it’s not recommended to cold plunge after red light therapy. For optimal benefits, do cold plunge first, followed by red light therapy. This sequence allows the cold exposure to prime your cells, enhancing the therapeutic effects of red light treatment. Wait 10-15 minutes after your cold plunge before starting red light therapy for best results.
Should you ice before or after red light therapy?
Apply ice or cold therapy before red light therapy, not after. Cold exposure before red light therapy can enhance cellular response and blood flow. However, wait at least 10 minutes after icing before starting red light treatment. Avoid icing immediately after red light therapy as it may diminish the treatment’s benefits.
What not to do after a cold plunge?
After a cold plunge, avoid these key activities:
- Don’t take a hot shower immediately
- Don’t exercise vigorously for 30 minutes
- Don’t consume caffeine right away
- Don’t sit in direct heat or sunlight
- Don’t skip the gentle movement phase
Instead, allow your body to warm naturally through light movement and proper clothing.
What should I avoid after red light therapy?
After red light therapy, avoid these activities for optimal results:
- Don’t apply cold therapy or ice
- Don’t use skincare products with photosensitive ingredients
- Don’t immediately expose treated areas to direct sunlight
- Don’t take hot showers or baths for 2 hours
- Don’t exfoliate or use harsh skin treatments
Wait at least 2 hours before applying any skincare products.
Can I do both therapies every day?
Yes, but listen to your body. I personally find that 5-6 days per week is optimal, allowing one day for complete rest. Start with 3 days and gradually increase frequency.
Which therapy should I do first?
In my experience, cold plunge followed by red light therapy provides the best results. The cold exposure primes your cells for the regenerative effects of red light.
How long until I see results?
Most of my students notice mental clarity improvements within the first week. Physical benefits typically become apparent within 2-4 weeks of consistent practice.
Is this safe during pregnancy?
Always consult your healthcare provider first. Generally, I recommend avoiding cold plunge during pregnancy but red light therapy may be beneficial when used appropriately.
Tracking Your Journey
📱 Digital Tracking
I use these apps to monitor my practice:
- Cold Plunge Timer (time/temperature)
- HRV monitoring
- Sleep quality metrics
📓 Journal Prompts
Record these daily:
- Energy levels (1-10)
- Mental clarity rating
- Physical recovery notes
- Emotional well-being
Embracing the Journey
Remember, this practice is about more than just physical benefits – it’s a journey of self-discovery and growth. As you combine these powerful modalities, you’ll likely discover, as I have, that the real transformation happens in the quiet moments between the cold and the light.
Your Next Steps
- Choose your starting equipment (recommendations above)
- Set up your practice space
- Begin with the Week 1 protocol
With warmth and light,
Sasha
This website may contain affiliate links. As an affiliate, we may earn a commission from qualifying purchases at no additional cost to you.
